Introduction
I travel for work and often leave gear in hotel rooms and rentals. I don’t love guessing whether something was moved, opened, or tampered with while I was out. I wanted a small, self‑hosted camera that records locally, lets me check in quickly, and doesn’t light up the room with Wi‑Fi beacons alerting to its presence. Running over Ethernet keeps the RF footprint quiet; recording to SD keeps evidence local, with an initial snapshot delivered remotely for notification. Initial research into off‑the‑shelf options came with sketchy third‑party clouds and control, so let’s build the solution.
Problem Statement
When I travel for work and leave gear in hotel rooms, short‑term rentals, or client spaces, I don’t have a reliable, low‑signature way to know promptly if anything was tampered with. That gap brings real risk: potential compromise of devices or data, monetary loss if equipment is stolen or damaged, and the stress of only discovering issues hours or days later.
The desired state is simple: get an early heads‑up (within about a minute) when something interacts with my gear, and keep a clear, timestamped, local record I can review on‑demand from a device I control — without drawing attention or increasing my RF footprint. I also want on‑demand streaming or still images, securely and remotely, to check the current state of the environment.
Solution
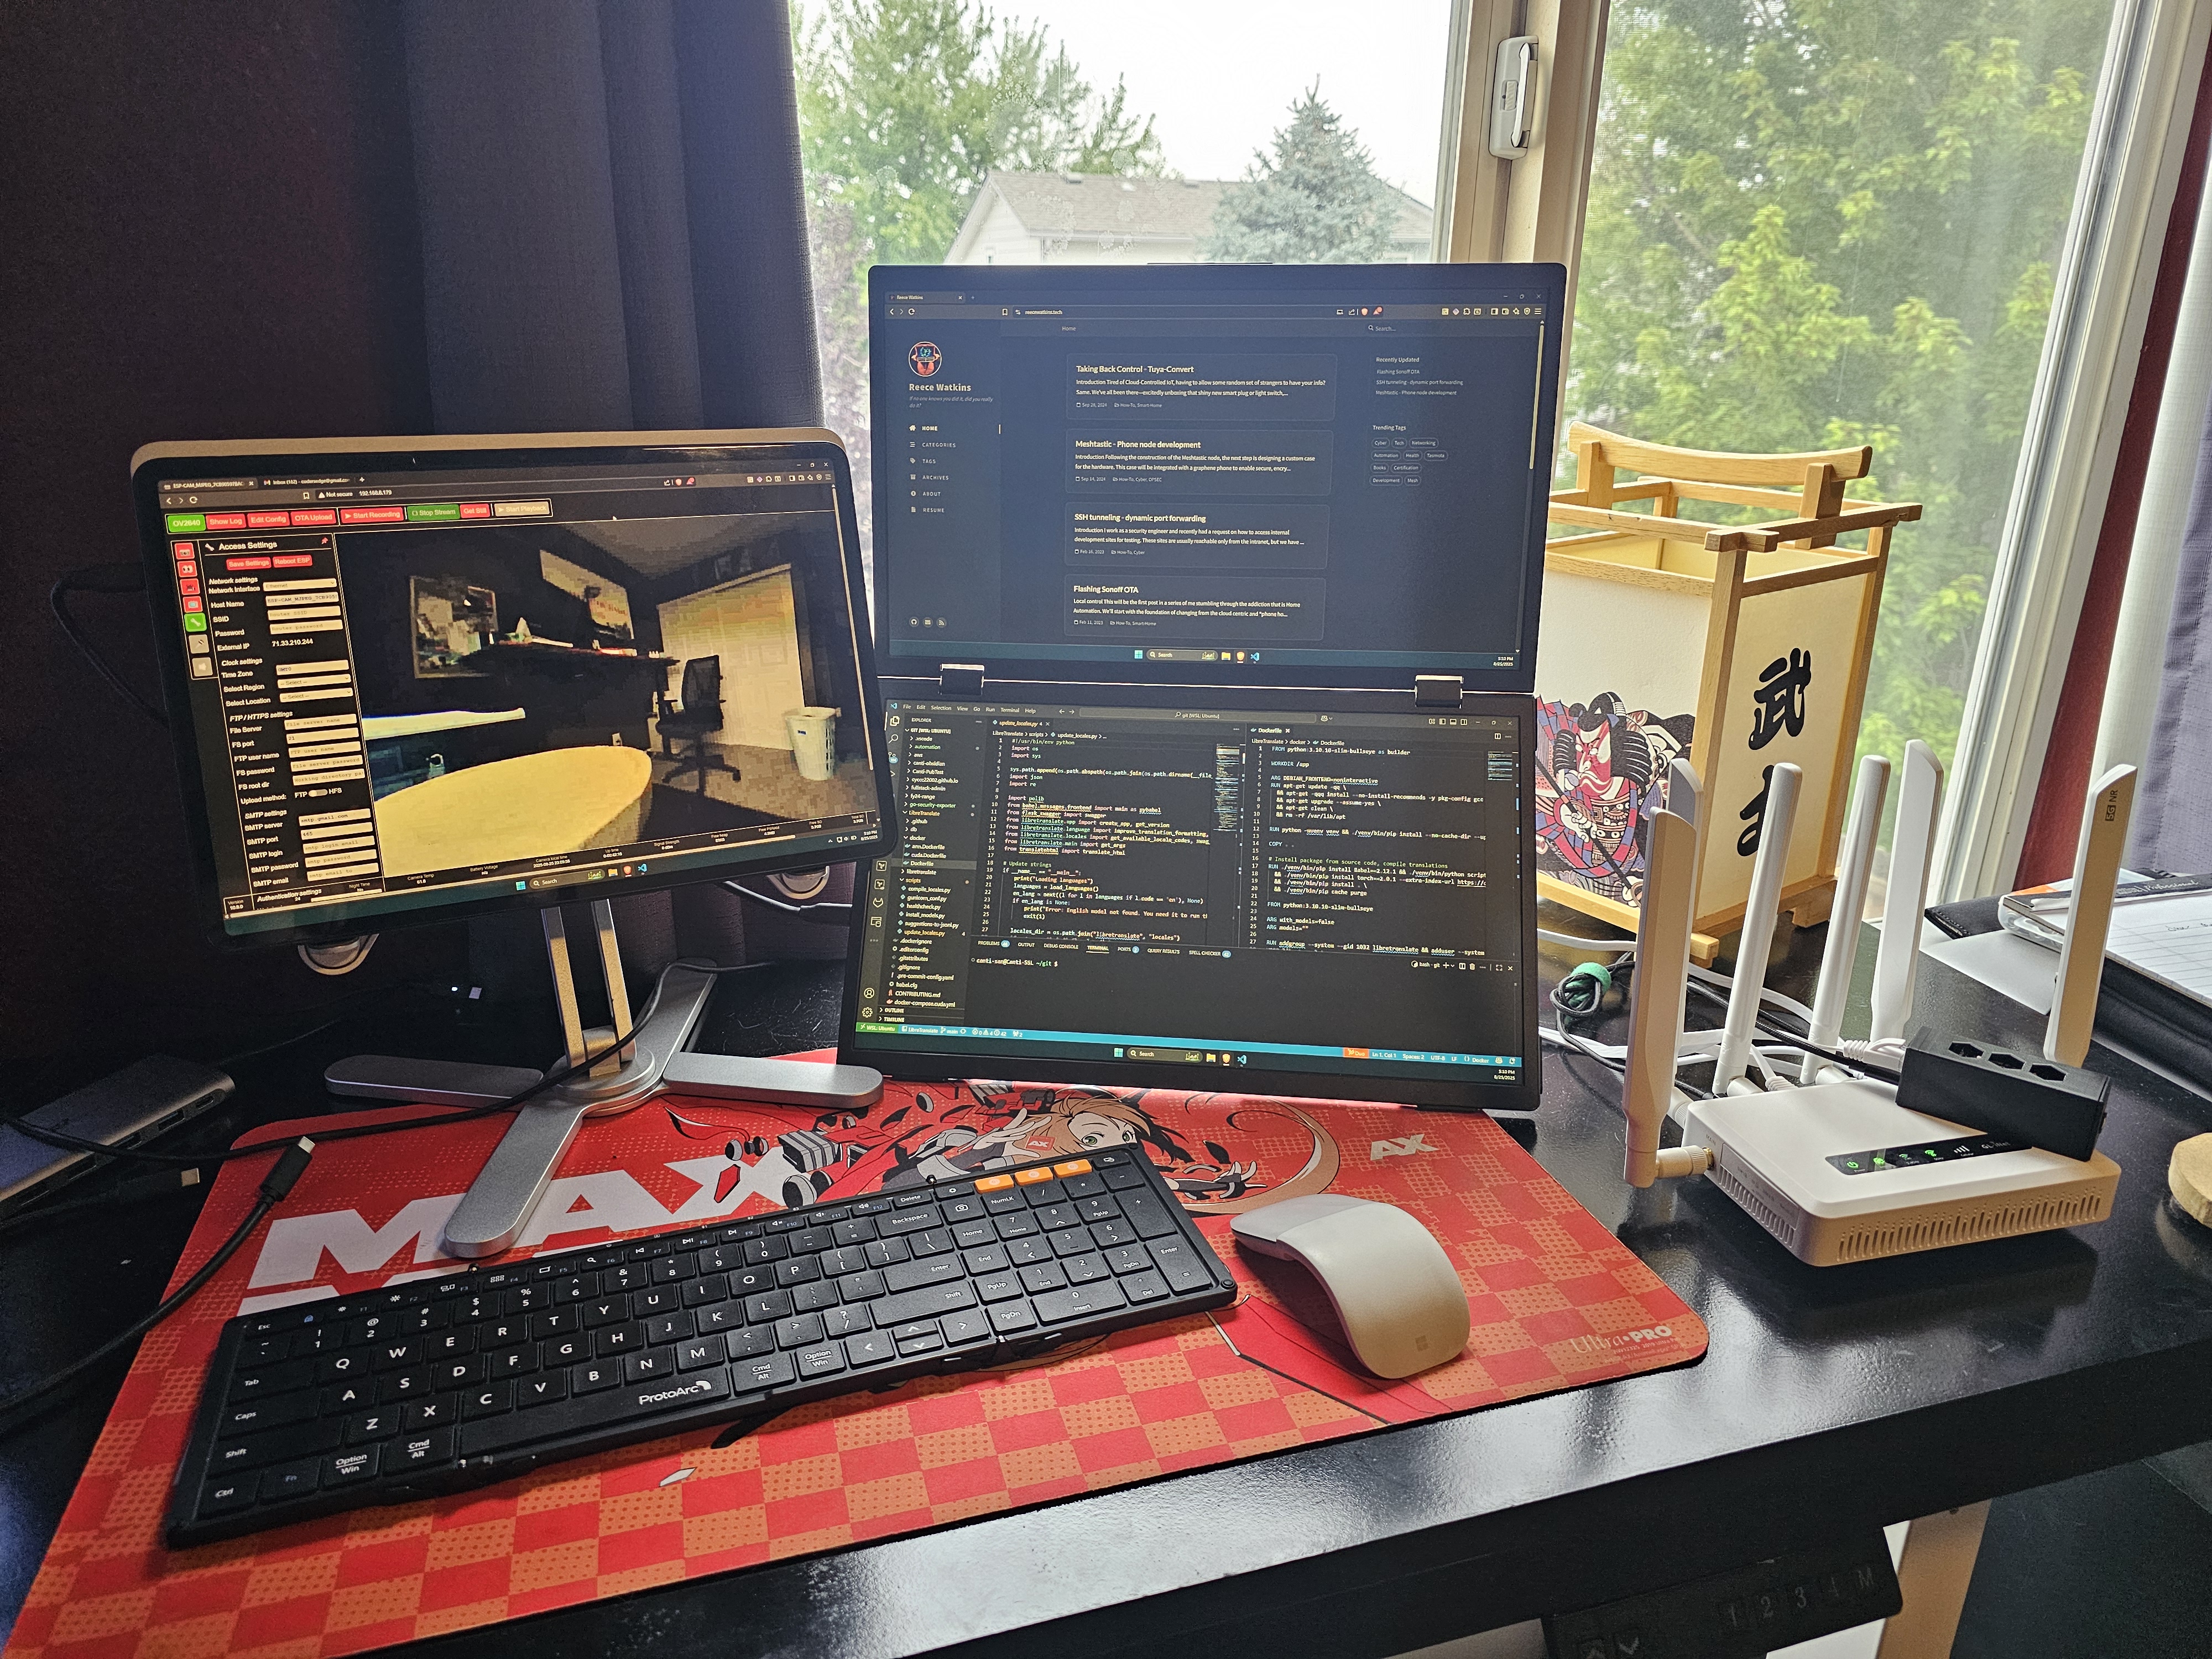
A custom ESP32-CAM in a small form factor that I can easily add to my travel kit.
I started from the excellent ESP32-CAM_MJPEG2SD by s60sc and adapted it so the device operates Ethernet‑only for day‑to‑day use. I forked the project and eventually submitted a pull request once I had it working.
Fork reference: RedCanti/ESP32-CAM_MJPEG2SD — this has all the necessary changes made for this project.
What we’ll build:
ESP32-S3-ETH Camera with Enclosure
- An ESP32‑CAM that has Wi‑Fi/BLE disabled
- SD recording with motion detection
- Browser viewing and streams over Ethernet
- Private Telegram motion alerts
What we’ll need to do:
Hardware
The hardware for this build is relatively lightweight and inexpensive, though that will also depend on the travel router you select. I will not be going into the configuration of the router as it can vary wildly across devices — you’ll need at least one LAN port for the camera, preferably PoE but not required.
All links below are Amazon Affiliate links.
Bill of Materials (BOM)
- ESP32 camera board with Ethernet capability
- Recommended: Waveshare ESP32‑S3‑ETH PoE (used for this build)
- Alternative: ESP32‑CAM + W5500 SPI Ethernet module
- MicroSD card (quality matters for sustained writes)
- Short Ethernet cable
- Optional: Short USB-C for power if PoE is not available
- Travel Router (any with LAN port works)
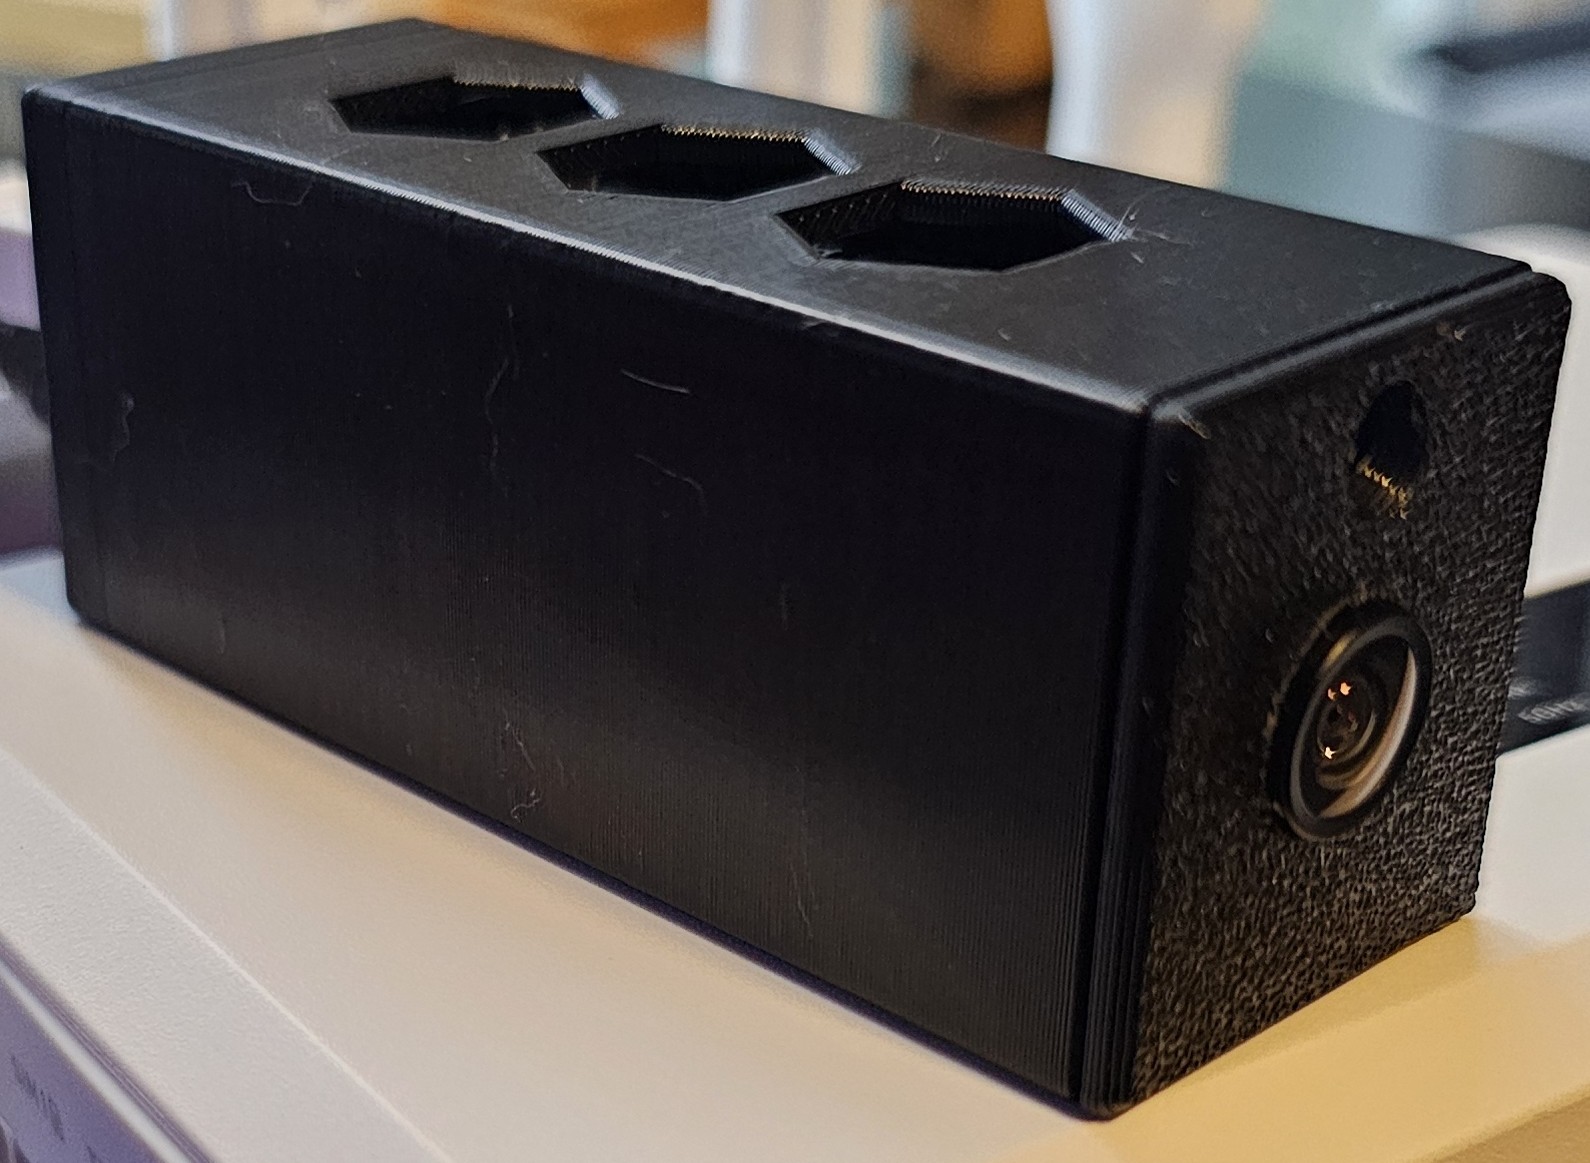
- 3D printed Case (small hole added for camera lens)
Build
Prepare Your Environment
- Install Arduino IDE
- Ensure the Arduino ESP32 core v3.3.0 is installed.
- Under Boards Manager: Search
esp32and install esp32 by Espressif Systems 3.3.0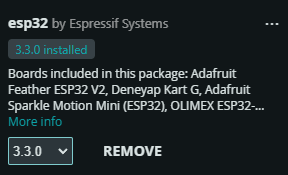
- Under Boards Manager: Search
- Prepare the microSD card.
- Format as FAT32. Prefer U3/V30 cards for sustained writes.
- Clone the fork: RedCanti/ESP32-CAM_MJPEG2SD and open the project.
- Arduino IDE may warn the sketch isn’t in a project folder — move all files into the project folder when prompted.
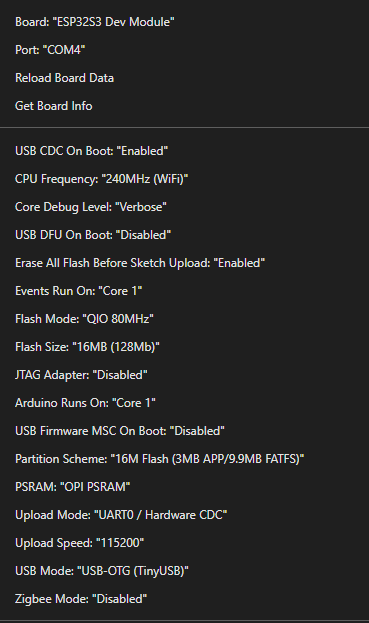
- Select the correct board and options in Arduino IDE. Match the settings shown below.
- In
appGlobals.h, set the board toCAMERA_MODEL_Waveshare_ESP32_S3_ETHand confirm SD interface settings.
Compile and Flash
Now that the environment is ready, let’s get the board configured.
- Connect your board to your PC while holding the boot button.
- Verify the board is connected and the correct serial port is selected.
- Compile and flash to the board — this will take a bit of time.
ℹ Info
If you see unable to mount SD card, the wrong board may be selected in appGlobals.h or the SD card format is incorrect (use FAT32).
Pre-flash example serial output
=========== Before Setup Start ===========
Chip Info:
------------------------------------------
 Model : ESP32-S3
 Cores : 2
 CPU Frequency : 240 MHz
------------------------------------------
INTERNAL Memory Info:
------------------------------------------
 Total Size : 272868 B ( 266.5 KB)
 Free Bytes : 225172 B ( 219.9 KB)
------------------------------------------
SPIRAM Memory Info:
------------------------------------------
 Total Size : 8388608 B (8192.0 KB)
 Free Bytes : 8386096 B (8189.5 KB)
 Bus Mode : OPI
------------------------------------------
Flash Info:
------------------------------------------
 Chip Size : 16777216 B (16 MB)
 Bus Speed : 80 MHz
 Bus Mode : QIO
------------------------------------------
Software Info:
------------------------------------------
 Compile Date/Time : Aug 4 2025 22:04:02
 ESP-IDF Version : v5.5-1-gb66b5448e0
 Arduino Version : 3.3.0
------------------------------------------
Board Info:
------------------------------------------
 Arduino Board : ESP32S3_DEV
 Arduino FQBN : esp32:esp32:esp32s3:UploadSpeed=115200,CDCOnBoot=cdc,CPUF6MB,PSRAM=opi
============ Before Setup End ============
First Boot and Web UI
After flashing, power the board with SD inserted. The serial output should look like this:
[00:00:01.248 logSetup] =============== ESP-CAM_MJPEG 10.8.0 ===============
[00:00:01.250 boardInfo] Chip ESP32-S3, 2 cores @ 240Mhz, rev 0
[00:00:01.251 logSetup] Compiled with arduino-esp32 v3.3.0
[00:00:01.252 setup] Selected board CAMERA_MODEL_Waveshare_ESP32_S3_ETH
[00:00:01.304 infoSD] SD card type SDHC, Size: 3.7GB, using 1 bit mode @ 40MHz
[00:00:02.027 prepCam] Camera model OV2640 ready @ 20MHz
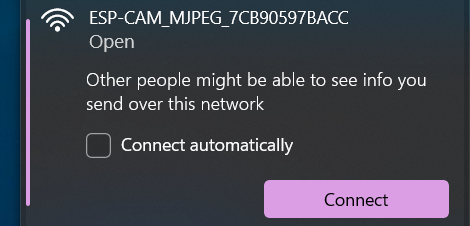
[00:00:02.217 onWiFiEvent] Wifi AP SSID: ESP-CAM_MJPEG_7CB90597BACC started, use 'http://192.168.4.1' to connect
[00:00:05.436 startWebServer] Starting web server on port: 80
[00:00:05.437 prepTelegram] Telegram not being used
[00:00:05.557 checkMemory] Setup Free: heap 120508, block: 77812, min: 119576, pSRAM 5672012
[00:00:05.578 loop] =============== Total tasks: 19 ===============ESP AP Advertisement
On first boot, the ESP32 advertises a temporary Access Point (AP) for setup. Connect to this AP to access the next configuration step.
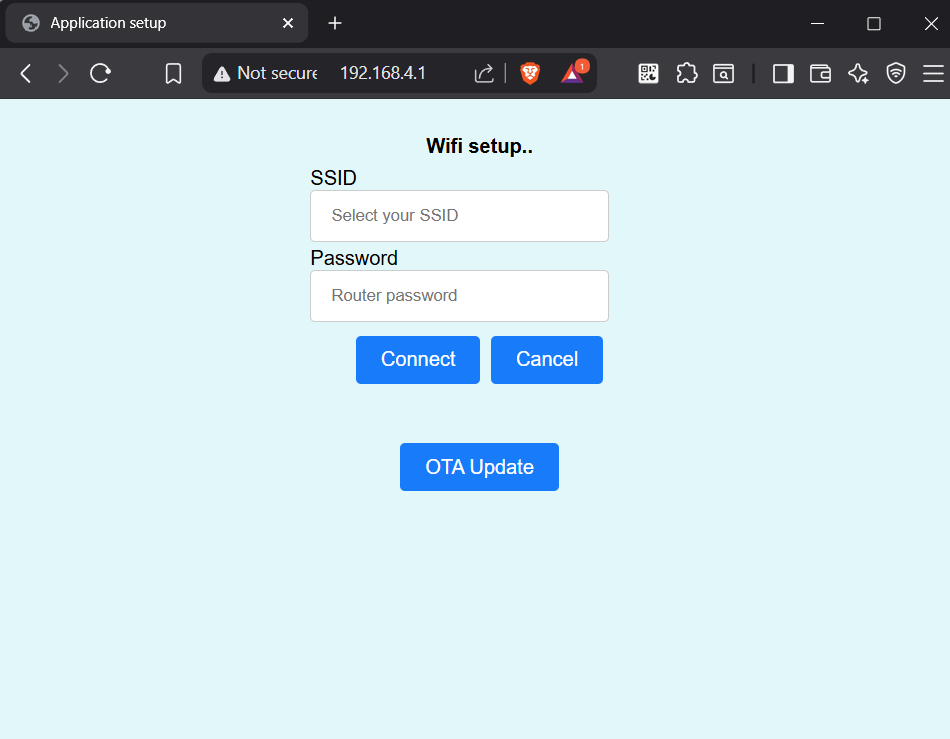
Connect to the AP and browse to 192.168.4.1, then select an SSID and add the password. The device will connect to the network and obtain a LAN IP address.
✓ Tip
Another method is to route to the advertised mDNS name in the boot log. This lets you access the UI without connecting to a Wi‑Fi network at all — skip straight to Configure Network below.
This AP is only for initial configuration. We’ll disable Wi‑Fi and run Ethernet‑only in the next section.
Expected serial output when connected to Wi-Fi
[00:02:18.443 logSetup] Compiled with arduino-esp32 v3.3.0
[00:02:19.399 setWifiSTA] Wifi Station IP from DHCP
[00:02:20.136 onWiFiEvent] WiFi Station connection to [REDACTED]
[00:02:21.420 onWiFiEvent] Wifi Station IP, use 'http://192.168.20.122' to connect
[00:02:25.379 startWifi] Wifi stats for [REDACTED] - signal strength: -62 dBm; Encryption: WPA2_PSK
[00:02:25.383 startWebServer] Starting web server on port: 80
[00:02:25.510 checkMemory] Setup Free: heap 113588, block: 69620, min: 113564, pSRAM 5668988
Configure Network
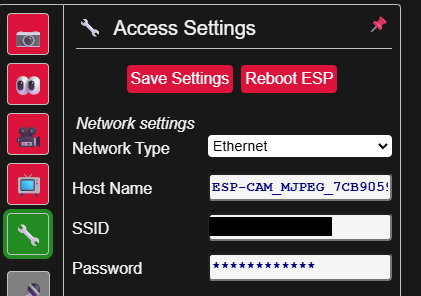
Camera Settings Tab
In the top‑left of the UI, select your board. Once selected, device‑specific settings appear. Click the wrench icon to open Settings and configure network.
Make sure you save settings so they persist after reboot.

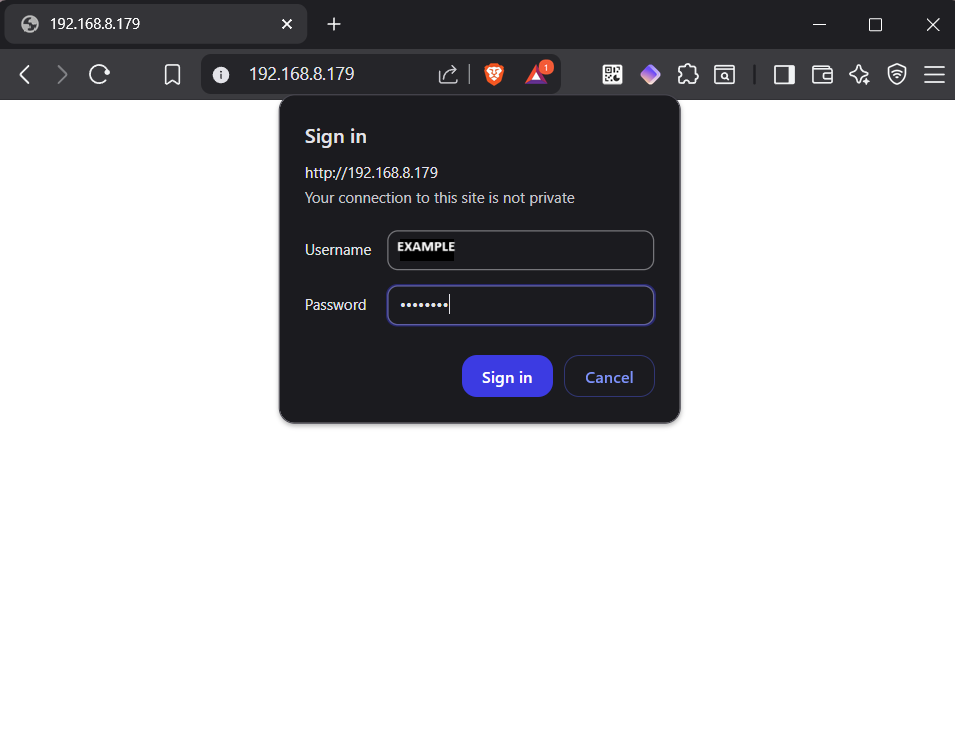
Secure Web Access
As a best practice (optional but recommended), set a web UI username and password. HTTPS requires configuring certificates — out of scope for this project.
To run Ethernet‑only:
- In the web UI, click the wrench icon → Settings → Network.
- Enable Ethernet.
- Disable Wi‑Fi Station and Wi‑Fi Access Point.
- Click Save, then reboot the device.
- Optional: Under Settings → External UI, set web username and password.
Ethernet Test
After enabling Ethernet‑only, make sure your device is connected to a viable LAN (e.g., your travel router) and reboot. After the reboot, your serial logs should look like this:
[00:32:00.328 startEth] Ethernet MAC CE:BA:97:05:B9:7C, IP 192.168.8.179
[00:32:00.331 setupMdnsHost] mDNS service: http://ESP-CAM_MJPEG_7.local
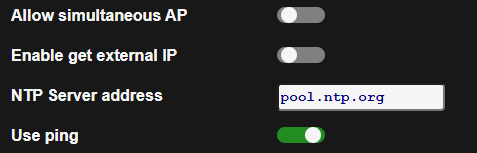
[00:32:00.338 getLocalNTP] Using NTP server: pool.ntp.org
[00:32:00.338 startWebServer] Starting web server on port: 80
[00:32:00.339 showLocalTime] Got current time from NTP: 28/08/2025 00:32:00 with tz: GMT0
[00:32:01.622 updateAppStatus] Enabling motion detection
[00:32:01.746 loop] =============== Total tasks: 21 ===============Expected: [startEth] with a valid MAC and IP, and no Wi‑Fi STA/AP connection lines.
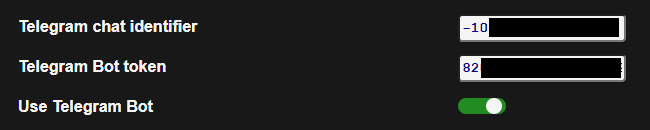
Optional: Telegram Motion Alerts
This is an optional feature provided by s60sc. Enable it in the web UI under Edit Config → Other tab:
- Use IDBot to obtain your Chat ID.
- Use BotFather to create a Telegram Bot and get the Bot Token.
- Paste the chat identifier and Bot Token, then select Use Telegram Bot.
After a reboot, a serial log line like this will confirm it’s working:
[prepTelegram] Connected to Telegram Bot Handle: [REDACTED]Deploy
We’ve finished the development of the device itself. Once fully configured, you’ll have a monitoring camera that alerts and records on motion.
My travel router provides redundant connectivity, so I use a PACE plan to ensure I can always connect — and my device maintains a WireGuard VPN tunnel at all times.
| Priority | Method |
|---|---|
| Primary | Cellular (eSIM) |
| Alternate | Room Ethernet uplink |
| Contingency | Wi‑Fi repeater of hotel Wi‑Fi |
| Emergency | Alert travel companions; return to room |
Physical setup:
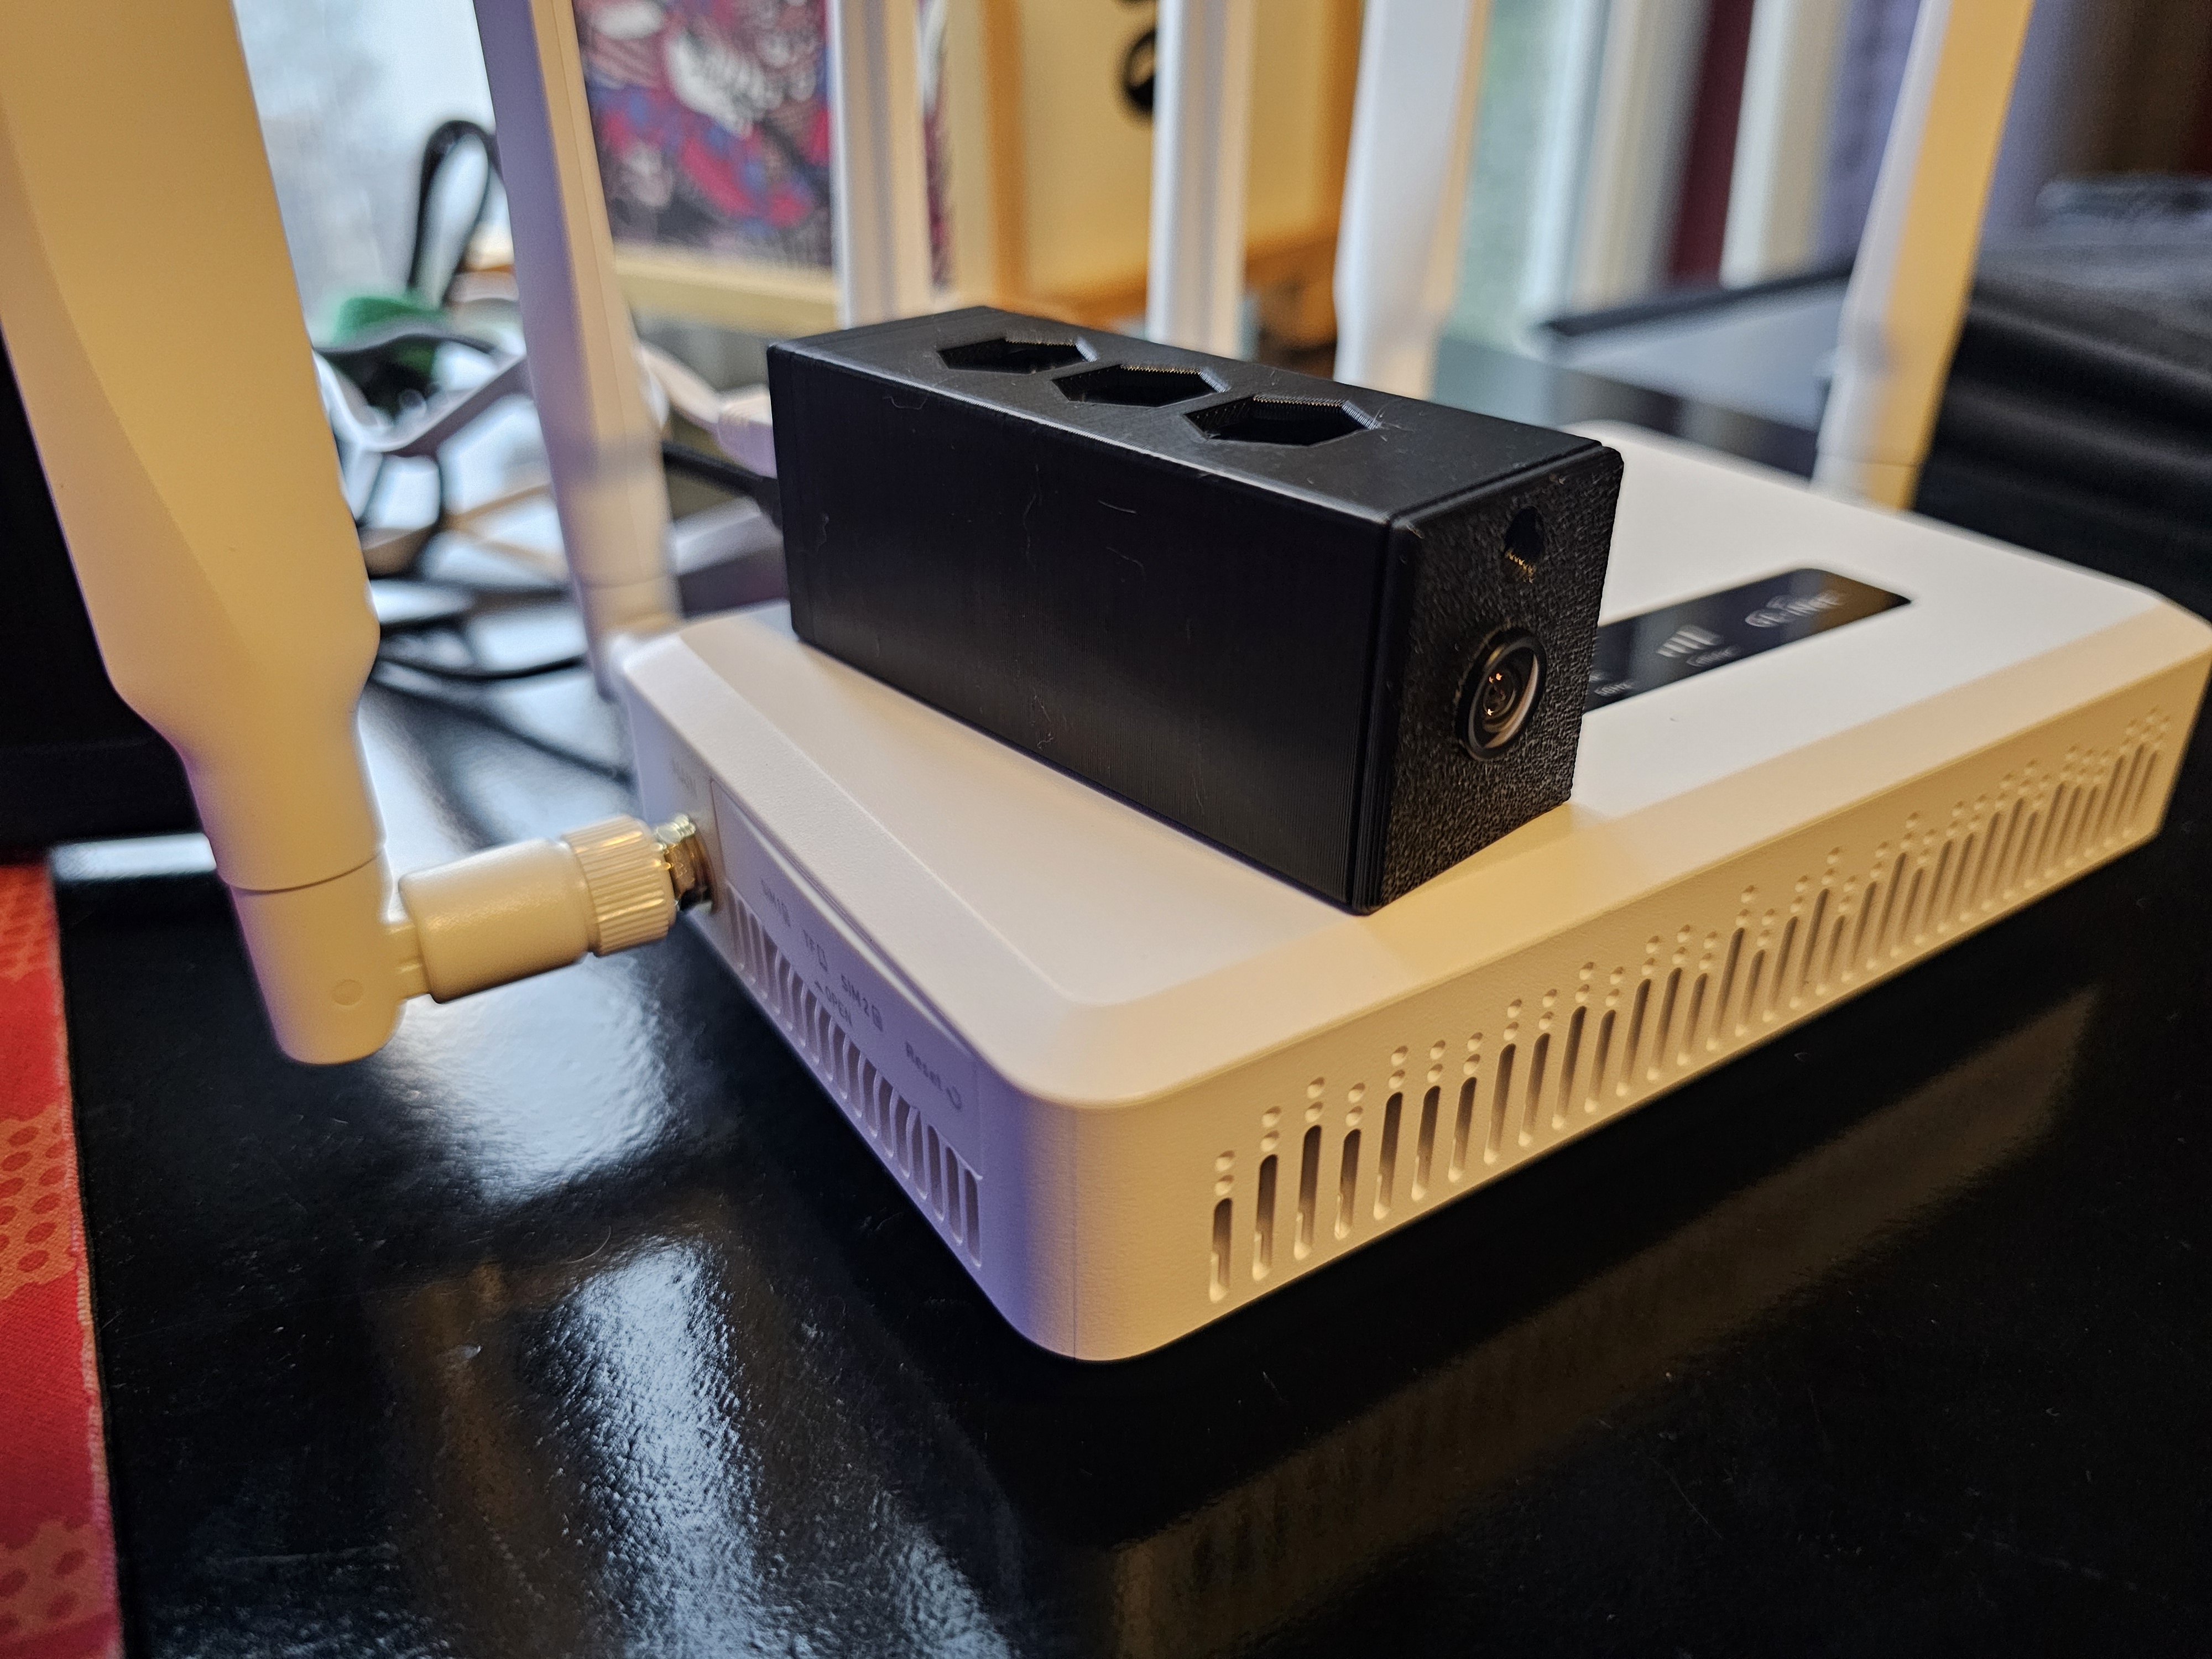
Place Camera
- Place the camera and aim it. Use PoE if available, or a clean 5V supply.
- Mine is hook-and-loop attached to my travel router.
- Connect via Ethernet to your router/switch.
Log In
- Once booted, access via browser from a device on the same network (or Tailscale).
- Check logs to confirm startup and Telegram connection.
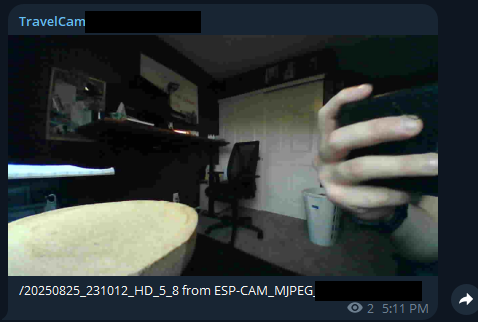
Get Notified!
Move in front of the camera and verify you receive Telegram notifications with the motion still image.
⚠ Warning
Hotel networks vary wildly. Prefer an isolated travel router with NAT, a known-good DNS setup to avoid captive portal weirdness, and a dedicated VPN.
Alert Received Workflow
- Telegram motion alert arrives
- Review still image for abnormalities
- If it seems odd, open a Tailscale session to the router
- Browse to the camera on the LAN
- Start stream to get the current situation
- If nothing is showing on stream, review the recorded video
Troubleshooting
- No link/DHCP: verify pins/cable and that Ethernet init happens before servers start
- No SD mount: confirm settings in
appGlobals.hare correct and SD is formatted FAT32 - SD write stutter: try a better SD card, reduce frame size, or pause motion detection while streaming
- RTSP stalls: enable only one transport (RTSP or HTTP sustain)
- mDNS not visible: start it after Ethernet and permit multicast on your host
For Developers
If you want to review the merged pull request, it’s in the 10.8.0 version of the project. I made changes only to the Waveshare board option in appGlobals.h. If you want to use Ethernet on any other board, you’ll need to set the SPI pins appropriate to that board or the additional Ethernet module.
Resources
- Huge shout out to s60sc for the awesome project!
- Original project: ESP32-CAM_MJPEG2SD
- Project fork: RedCanti/ESP32-CAM_MJPEG2SD
- Waveshare Wiki: ESP32-S3-ETH_PoE
- Ethernet Chipset: W5500